
Tutorials
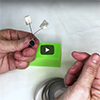
Tip: When using conductive tape cut the silver not the white. Cut the tape not the backing. It saves having to separate the tape from the backing.
|
TapeBlock Concept
|
|
|---|---|
 Introducing TapeBlocks
|
 Play with TapeBlocks
|
|
TapeBlock Making
|
|
 Make a Power TapeBlock
|
 Make a Light TapeBlock
|
 Make a Vibration TapeBlock
|
 Make a Roof TapeBlock
|
 Make a Fan TapeBlock
|
 Make a TapeBlock Voltmeter
|
| TapeBlock Variation | |
 The Simplest Circuit
|
 Conductive Play with TapeBlocks
|
 Make a BreadBoard TapeBlock
|
 Make a bubble wrap bracelet
|
| Programming TapeBlocks with Micro:Bit | |
| TapeBlock Help | |

Conductive Tape Tips
|

Problem Solving
|
|
TapeBlock Concepts |
Introducing TapeBlocks
Pre-Made TapeBlocks can be stacked and arranged in many combinations. This video is designed to introduce the concept of putting TapeBlocks together. They are really accessible and can be pushed together including by people living with a disability.
Play with TapeBlocks
Pre-Made TapeBlocks can be stacked and arranged in many combinations. This video is designed to introduce the basic concepts but are only the start of how TapeBlocks can be used. Explore, Discover and Create.
|
TapeBlock Making |
Make a Power TapeBlock
Materials
- 3V CR2032 Battery
- Battery holder
- Conductive Tape
- Foam Block
Aim
To make a Power TapeBlock that can be connected to other TapeBlock
Instructions
- Wrap two parallel rows of conductive tape all the way around the short side of a foam block.
- Make sure that the two rows of tape are about 1cm apart and do not touch each other.
- Position the battery carrier over the two pieces of conductive tape so that one pin is over each piece of tape.
- Push both of the pins into the conductive tape
Problems Solving
If the Power TapeBlock is not working check that the pins in the Battery holder are touching both pieces of conductive tape. Also check the problem solving section.
Make an LED TapeBlock
Materials
- LED
- Conductive Tape
- Foam Block
Aim
To make an LED TapeBlock that will turn the LED on when connected to a Power TapeBlock
Instructions
- Take the two legs of an LED and split them apart until the LED will sit flat on a foam block
- Orientate the LED legs so they run along the centre of one of the long sides of the block
- Wrap two parallel rows of conductive tape all the way around the foam block and over the top of the legs of the LED.
- Make sure that the two rows of tape are about 1cm apart and do not touch each other.
Problems Solving
If the LED TapeBlock is not working check that the legs on the LED are touching conductive tape. Also check the problem solving section.
Make an Vibration TapeBlock
Materials
- Vibration motor
- Conductive Tape
- Foam Block
Aim
To make a Vibration LED TapeBlock that will turn the vibration motor on when connected to a Power TapeBlock
Instructions
- Take the two wires of a vibration motor and wrap each in a small piece of tape
- Peel the backing off the vibration motor and stick in the middle of the long side of a foam block.
- Split the two wires apart and orientate the wires so they run along the centre of one of the long sides of the block
- Wrap two parallel rows of conductive tape all the way around the foam block and over the top of the wires of the vibration motor.
- Make sure that the two rows of tape are about 1cm apart and do not touch each other.
Problems Solving
If the vibration motor TapeBlock is not working check that the wires are touching conductive tape. Also check the problem solving section.
Make an Roof LED TapeBlock
Materials
- LED
- Conductive Tape
- Triangle Foam Block
Aim
To make an Roof LED TapeBlock that will turn the LED on when connected to a Power TapeBlock
Instructions
- Use a Triangle foam block
- Take the two legs of an LED and split them apart until the LED will sit flat on a point of the foam block
- Wrap a piece of conductive tape over one leg, down the side of the block and run it less than half way across the bottom of the foam block.
- Wrap a second piece of conductive tape over the other leg, down the side of the block and run it less than half way across the bottom of the foam block.
- Make sure that the two pieces of tape do not touch each other.
- Place the Roof Block on a Power TapeBlock
Problems Solving
If the LED TapeBlock is not working check that the legs on the LED are touching conductive tape. Also check the problem solving section.
Make an Fan TapeBlock
Materials
- Fan motor
- Fan
- Conductive Tape
- Foam Block with hole drilled in it
Aim
To make a Fan TapeBlock that will turn the fan motor on when connected to a Power TapeBlock
Instructions
- Take the two wires of a fan motor and wrap each in a small piece of tape
- Pull the wires toward the shaft and then insert the motor into the pre drilled hole in the foam block.
- Split the two wires apart and orientate the wires so they run along the centre of one of the long sides of the block
- Wrap two parallel rows of conductive tape all the way around the foam block and over the top of the wires of the fan motor. This can be fiddly.
- Make sure that the two rows of tape are about 1cm apart and do not touch each other.
Problems Solving
If the fan motor TapeBlock is not working check that the wires are touching conductive tape. Also check the problem solving section.
Make a TapeBlock Voltmeter
Materials
- Voltmeter with 2 wires
- Dess making pins
- Conductive Tape
- Foam Block
Aim
To make an easy to use TapeBlock that will display the voltage of the circuit when connected to a Power TapeBlock
Instructions
- Take the voltmeter and sit it flat on a foam block.
- Orientate the voltmeter so that it will be readable when the block is in the long direction. Make sure that the wires are not under the component.
- Wrap a parallel rows of conductive tape all the way around the foam block above the voltmeter. Place the red wire above the voltmeter. Sandwich the red wire between the upper and lower pieces of conductive tape.
- Wrap a parallel rows of conductive tape all the way around the foam block under the voltmeter. Place the black wire above the voltmeter. Sandwich the black wire between the upper and lower pieces of conductive tape.
- Make sure that the two rows of tape are about 1cm apart and do not touch each other. The black and red wire are insulated with plastic, ensure that the end of the wire is touching the conductive tape.
Problems Solving
If the voltmeter TapeBlock is not working check that the wire on the voltmeter are touching conductive tape. Ensure that the positive on the Power TapeBlock is touching the positive on the Voltmeter TapeBlock. Also check the problem solving section.
|
TapeBlock Variations |
Make the Simplest Circuit
Materials
- LED
- 3V CR2032 Battery
Aim
To make an LED circuit by connecting directly to a battery
Instructions
- Take the two legs of an LED and find the longer leg
- Take a CR3023 Battery and find the posotive side (the one with the + sign)
- Insert the battery between the two legs with the posotive to the long leg.
- Some LEDs will only work one way other can work both directions.
- More than one LED can be used with a battery at a time.
Problems Solving
If the LED is not working check the direction of the battery and the battery is not flat. Also check the problem solving section.
TapeBlock Conductive Play
Using conductive materials with TapeBlocks
Materials
- Conductive material (Tin foil)
- Power TapeBlock
- Working LED TapeBlock and/or
- Working Vibration TapeBlock and/or
- Working Fan TapeBlock and/or
Aim
Using conductive materials with TapeBlocks to explore and to experiment to build understanding.
Instructions
- Place two pieces of tinfoil about 1cm apart on a non conductive table.
- Place the TapeBlocks on the tin foil so that on piece of conductive tape touches each piece of foil, make sure the two piece of foil don't touch.
- Play! Try different material and distances
Problems Solving
If the LED TapeBlock is not working check that check that the two piece of tape and the two pieces of foil are not touching. Also check the problem solving section.
TapeBlock BreadBoard
Materials
- 3V CR2032 Battery
- Battery holder
- Conductive Tape
- Foam Block
- LEDs
Aim
To make a BreadBoard TapeBlock that LEDs can be inserted into and used to experiment with and build understanding.
Instructions
- Wrap two parallel rows of conductive tape around three sides of a foam block.
- Make sure that the two rows of tape are about .5cm apart and do not touch each other.
- Make holes in both rows of tape in pairs along the length of the tape.
- Position the battery carrier at the end or on one side of the block so that one pin is over each piece of tape.
- Push both of the pins into the conductive tape
- Take the two legs of an LED and split them apart until the LED will reach both of the pieces of tape and push them in.
Problems Solving
If the LED TapeBlock is not working check that the legs of the LED are touching conductive tape. Also check the problem solving section.
TapeBlock Bubblewrap Bracelet using the TapeBlock Method
Materials
- 3V CR2032 Battery
- Battery holder
- Conductive Tape
- Bubblewrap
- LEDs (3 color change)
- Decoration (3 butterflies)
Aim
To make a Bubblewrap bracelet that has color change LED.
Instructions
- Measure a piece of bubble wrap to make sure it is large enough for your wrist.
- Run two parallel rows of conductive tape along the bubble wrap close to the bottom edge
- Make sure that the two rows of tape are about 1cm apart and do not touch each other.
- Take the two legs of an LED put a small bend in the short leg then split the legs apart so that it will sit flat on the bubble wrap.
- Place 3 LEDs about 3cm apart with the bent leg on one piece of tape and the straight leg on the other piece of tape.
- Cover the LEDs with a second piece of tape so that each of the legs is sandwiched.
- Cut away the end piece of the bubble wrap to make it easier to get to the conductive tape
- Roll the bubblewrap so that the LEDs are in the centre
- Hold down the bubble wrap with clear tape
- Insert the battery carrier into the rolled up bubble wrap with the wires facing out
- Use conductive tape to attache each of the wires to the two parallel pieces of conductive tape
- Turn the Circuit on.
- Decorate with the Butterflies
- Use clear tape to hold the bracelet around the wrist
Problems Solving
If the LED TapeBlock is not working check that the legs of the LED are touching conductive tape. Also check the problem solving section.
|
Programming TapeBlocks with Micro:Bit |
|
TapeBlock Help |
TapeBlock Conductive Tape Tips
Here are some important tips on how to use conductive tape.
- Cut the Tape not the Backing - it save having to lift the ends
- Peel of the tape as you go to keep control
- Be careful what the tape is touching - if it touches metal it will not work
Problem Solving
With TapeBlocks there is nothing hidden or mysterious so it should be possible to solve most issues by methodically working through a problem solving process. Check the simple things before the more complex. Remember that electronic components are delicate so you may have the circuit correct and the part may not be working.
- Check that the two piece of tape are not touching
- Check that the battery is not flat.
- Check that nothing else is touching the metal parts.